
Skill Tree
One long tree of 55 nodes and 5 keystones, bought with skill points from chests and gates.
The Skill Tree is one long tree, opened by breaking gate 12. You spend  skill points on nodes; each node is a single purchase that pays a small bundle of two or three buffs. The left side leans idle — chest loot, shards, ore, coins, crafting — and the right side leans on the gate: damage, accuracy, pierce, pet power. Its buffs reach outside the Hoard too (ore yield, coin gain, XP, ball regen, drop rate and crafting chances).
Earning skill points
| Source | Skill points |
|---|---|
 LEGENDARY CHEST LEGENDARY CHEST | 1 every open |
 MYTHIC CHEST MYTHIC CHEST | 2 every open |
 CHAMPION CHEST CHAMPION CHEST | 6 every open |
| Any chest | 5% chance of +1 (raised by Skill Points upgrades) |
 Breaking a gate Breaking a gate | 2 per gate |
 Bought with gems Bought with gems | 125 gems a point |
How the tree is laid out
The tree is 5 chapters of six rows. Each chapter starts with a left and a right node, forks, rejoins, and ends on a keystone in the middle. To buy a node you need any one of the nodes it hangs from, the gate its row asks for, and the points.
| Chapter | Rows | Needs gate | Node price (first tier) | Keystone | Chapter total |
|---|---|---|---|---|---|
| 1 · FIRST BOND | 1–6 | 12 | 1–3 |  ONE MORE COLLAR (5 pts) ONE MORE COLLAR (5 pts) | 23 |
| 2 · GROWING PACK | 7–12 | 14 17 | 4–12 |  THE SECOND COLLAR (20 pts) THE SECOND COLLAR (20 pts) | 96 |
| 3 · DEEPER ROOTS | 13–18 | 20 24 | 15–28 |  THE THIRD COLLAR (50 pts) THE THIRD COLLAR (50 pts) | 266 |
| 4 · THE GREAT HUNT | 19–24 | 28 32 | 32–50 |  THE LAST COLLAR (100 pts) THE LAST COLLAR (100 pts) | 1,648 |
| 5 · THE WHOLE HOARD | 25–30 | 37 42 47 | 80–200 |  THE WHOLE HOARD (500 pts) THE WHOLE HOARD (500 pts) | 5,494 |
From row 19 on, the side nodes are deep nodes with three tiers. Each tier pays the node's bundle again and costs ×1.25 the last — Shard Sifter is 32 / 40 / 50 points.
Keystones
4 of the 5 keystones are collars: each adds a pet slot to the hoard crew on top of its other buffs. The last keystone is the crown of the tree.
| Keystone | Row | Needs gate | Cost | Pays |
|---|---|---|---|---|
| ONE MORE COLLAR | 6 | 12 | 5 | +1 Hoard Pet Slot · +1% Chest Speed · +2% Crit Chance |
| THE SECOND COLLAR | 12 | 17 | 20 | +1 Hoard Pet Slot · +15% Ball Regen · +10% Hoard Damage · +2s Gate Attempt Time |
| THE THIRD COLLAR | 18 | 24 | 50 | +1 Hoard Pet Slot · +15% Shards from Chests · +20% Pet Power · +15 Gate Accuracy · +10% XP Gain |
| THE LAST COLLAR | 24 | 32 | 100 | +1 Hoard Pet Slot · +15% Chest Loot · +20% Gate Damage · +25 Armor Pierce · +3s Gate Attempt Time · +1% 5x Craft |
| THE WHOLE HOARD | 30 | 47 | 500 | +25% Gate Damage · +40% Pet Power · +35% Hoard Damage · +25% Chest Loot · +30% Team Damage · +10% Crit Chance · +2% 20x Craft · +1% 100x Craft |
All nodes
“Pays” is what one tier of the node gives; a three-tier node gives it three times.
| Row | Chapter | Side | Node | Pays (per tier) | Tiers | Cost | Needs gate |
|---|---|---|---|---|---|---|---|
| 1 | 1 · FIRST BOND | Left |  Deep Haul Deep Haul | +5% Chest Loot · +3% Shards from Chests | 1 | 1 | 12 |
| 1 | 1 · FIRST BOND | Right |  First Bite First Bite | +3% Hoard Damage · +5 Gate Accuracy | 1 | 1 | 12 |
| 2 | 1 · FIRST BOND | Left |  Wide Seams Wide Seams | +5% Ore Yield · +4% Coin Gain · +2% Cheaper Bars | 1 | 1 | 12 |
| 2 | 1 · FIRST BOND | Right |  Warm Kennel Warm Kennel | +5% Pet Power · +2% Hoard Swing Speed | 1 | 1 | 12 |
| 3 | 1 · FIRST BOND | Left | Point Hoarder | +4% Skill Point Drops · +3% XP Gain | 1 | 2 | 12 |
| 3 | 1 · FIRST BOND | Right |  Chipping Fang Chipping Fang | +10 Armor Pierce · +5% Gate Damage | 1 | 2 | 12 |
| 4 | 1 · FIRST BOND | Left |  Artifact Nose Artifact Nose | +5% Artifact Chance · +5% Chest Loot | 1 | 2 | 12 |
| 4 | 1 · FIRST BOND | Right |  Ranging Eye Ranging Eye | +10 Gate Accuracy · +2% Crit Chance | 1 | 2 | 12 |
| 5 | 1 · FIRST BOND | Left |  Steady Hand Steady Hand | +1% Free Craft · +2% Triple Craft · +3% Double Craft | 1 | 3 | 12 |
| 5 | 1 · FIRST BOND | Right |  Quick Swing Quick Swing | +4% Hoard Swing Speed · +15 Armor Pierce | 1 | 3 | 12 |
| 6 | 1 · FIRST BOND | KEYSTONE | ONE MORE COLLAR | +1 Hoard Pet Slot · +1% Chest Speed · +2% Crit Chance | 1 | 5 | 12 |
| 7 | 2 · GROWING PACK | Left |  Pack Aura Pack Aura | +9% Team Damage · +5% Shards from Chests | 1 | 4 | 14 |
| 7 | 2 · GROWING PACK | Right |  Full Bellies Full Bellies | +8% Pet Power · +3% Hoard Damage | 1 | 4 | 14 |
| 8 | 2 · GROWING PACK | Left |  Rich Ground Rich Ground | +8% Ore Yield · +7% Drop Rate · +3% Cheaper Bars | 1 | 5 | 14 |
| 8 | 2 · GROWING PACK | Right |  Second Wind Second Wind | +2% Gate Cooldown Cut · +2s Gate Attempt Time | 1 | 5 | 14 |
| 9 | 2 · GROWING PACK | Left |  Long Vigil Long Vigil | +8% Chest Loot · +1% Chest Speed | 1 | 7 | 14 |
| 9 | 2 · GROWING PACK | Right |  Breacher Breacher | +10% Gate Damage · +10 Gate Accuracy | 1 | 7 | 14 |
| 10 | 2 · GROWING PACK | Left |  Deep Pockets Deep Pockets | +12% Coin Gain · +9% Ball Regen | 1 | 10 | 17 |
| 10 | 2 · GROWING PACK | Right |  Drilled Rhythm Drilled Rhythm | +4% Hoard Swing Speed · +2% Crit Chance | 1 | 10 | 17 |
| 11 | 2 · GROWING PACK | Left |  Deeper Vaults Deeper Vaults | +3% Chest Tier-Up Chance · +2% Double Artifact Roll · +4% Artifact Chance | 1 | 12 | 17 |
| 11 | 2 · GROWING PACK | Right |  Star Fury Star Fury | +0.3% Damage per Pet Star · +6% Evolved Pet Damage · +8% Pet Power | 1 | 12 | 17 |
| 12 | 2 · GROWING PACK | KEYSTONE | THE SECOND COLLAR | +1 Hoard Pet Slot · +15% Ball Regen · +10% Hoard Damage · +2s Gate Attempt Time | 1 | 20 | 17 |
| 13 | 3 · DEEPER ROOTS | Left |  Pack Tactics Pack Tactics | +12% Team Damage · +8% Shards from Chests | 1 | 15 | 20 |
| 13 | 3 · DEEPER ROOTS | Right |  Rending Claw Rending Claw | +25 Armor Pierce · +10% Gate Damage | 1 | 15 | 20 |
| 14 | 3 · DEEPER ROOTS | Left |  Mother Lode Mother Lode | +12% Ore Yield · +8% XP Gain · +4% Cheaper Bars | 1 | 18 | 20 |
| 14 | 3 · DEEPER ROOTS | Right |  Off The Leash Off The Leash | +2s Gate Attempt Time · +2% Gate Cooldown Cut | 1 | 18 | 20 |
| 15 | 3 · DEEPER ROOTS | Left |  Point Magnet Point Magnet | +8% Skill Point Drops · +8% Drop Rate | 1 | 22 | 20 |
| 15 | 3 · DEEPER ROOTS | Right |  True Line True Line | +20 Gate Accuracy · +2% Crit Chance | 1 | 22 | 20 |
| 16 | 3 · DEEPER ROOTS | Left |  Even Pour Even Pour | +2% Free Craft · +6% Triple Craft · +5% Double Craft | 1 | 25 | 24 |
| 16 | 3 · DEEPER ROOTS | Right |  Deep Bond Deep Bond | +12% Pet Power · +6% Hoard Damage | 1 | 25 | 24 |
| 17 | 3 · DEEPER ROOTS | Left |  Twice Over Twice Over | +4% Double Artifact Roll · +15% Chest Loot · +1% Chest Speed | 1 | 28 | 24 |
| 17 | 3 · DEEPER ROOTS | Right |  Killing Blow Killing Blow | +3% Crit Chance · +15% Gate Damage · +5% Hoard Swing Speed | 1 | 28 | 24 |
| 18 | 3 · DEEPER ROOTS | KEYSTONE | THE THIRD COLLAR | +1 Hoard Pet Slot · +15% Shards from Chests · +20% Pet Power · +15 Gate Accuracy · +10% XP Gain | 1 | 50 | 24 |
| 19 | 4 · THE GREAT HUNT | Left |  Shard Sifter Shard Sifter | +12% Shards from Chests · +5% Artifact Chance | 3 | 32 / 40 / 50 | 28 |
| 19 | 4 · THE GREAT HUNT | Right | 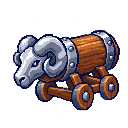 Siegebreaker Siegebreaker | +10% Gate Damage · +20 Armor Pierce | 3 | 32 / 40 / 50 | 28 |
| 20 | 4 · THE GREAT HUNT | Left |  Ball Spring Ball Spring | +8% Ball Regen · +18% Coin Gain | 3 | 36 / 45 / 56 | 28 |
| 20 | 4 · THE GREAT HUNT | Right | Loyalty | +10% Pet Power · +5% Hoard Damage | 3 | 36 / 45 / 56 | 28 |
| 21 | 4 · THE GREAT HUNT | Left | Bottomless Seam | +12% Ore Yield · +8% XP Gain · +2% Cheaper Bars | 3 | 40 / 50 / 63 | 28 |
| 21 | 4 · THE GREAT HUNT | Right |  Blur Blur | +7% Hoard Swing Speed · +1% Gate Cooldown Cut | 3 | 40 / 50 / 63 | 28 |
| 22 | 4 · THE GREAT HUNT | Left |  Vault Cracker Vault Cracker | +10% Chest Loot · +2% Chest Speed · +2% Chest Tier-Up Chance | 3 | 45 / 56 / 70 | 32 |
| 22 | 4 · THE GREAT HUNT | Right |  Constellation Constellation | +0.1% Damage per Pet Star · +3% Evolved Pet Damage · +20 Gate Accuracy | 3 | 45 / 56 / 70 | 32 |
| 23 | 4 · THE GREAT HUNT | Left |  The Sleeping Pack The Sleeping Pack | +10% Team Damage · +12% Shards from Chests | 3 | 50 / 63 / 78 | 32 |
| 23 | 4 · THE GREAT HUNT | Right |  Long Leash Long Leash | +2s Gate Attempt Time · +10% Gate Damage | 3 | 50 / 63 / 78 | 32 |
| 24 | 4 · THE GREAT HUNT | KEYSTONE | THE LAST COLLAR | +1 Hoard Pet Slot · +15% Chest Loot · +20% Gate Damage · +25 Armor Pierce · +3s Gate Attempt Time · +1% 5x Craft | 1 | 100 | 32 |
| 25 | 5 · THE WHOLE HOARD | Left |  The Mint The Mint | +22% Coin Gain · +8% Ball Regen · +1% 5x Craft | 3 | 80 / 100 / 125 | 37 |
| 25 | 5 · THE WHOLE HOARD | Right | Perfect Strike | +4% Crit Chance · +35 Armor Pierce | 3 | 80 / 100 / 125 | 37 |
| 26 | 5 · THE WHOLE HOARD | Left |  Fortune's Eye Fortune's Eye | +12% Drop Rate · +12% XP Gain · +5% Skill Point Drops | 3 | 100 / 125 / 156 | 37 |
| 26 | 5 · THE WHOLE HOARD | Right | Eternal Watch | +15% Pet Power · +8% Hoard Damage | 3 | 100 / 125 / 156 | 37 |
| 27 | 5 · THE WHOLE HOARD | Left | 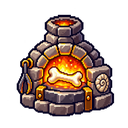 The Foundry The Foundry | +6% Triple Craft · +3% Free Craft · +4% Double Craft | 3 | 125 / 156 / 195 | 37 |
| 27 | 5 · THE WHOLE HOARD | Right |  Dead Eye Dead Eye | +30 Gate Accuracy · +1% Gate Cooldown Cut | 3 | 125 / 156 / 195 | 37 |
| 28 | 5 · THE WHOLE HOARD | Left |  Bottomless Bottomless | +10% Artifact Chance · +4% Double Artifact Roll · +18% Shards from Chests | 3 | 150 / 188 / 234 | 42 |
| 28 | 5 · THE WHOLE HOARD | Right | Apex Predator | +0.2% Damage per Pet Star · +5% Evolved Pet Damage · +12% Pet Power · +1% Gate Damage per Shiny in your Dex | 3 | 150 / 188 / 234 | 42 |
| 29 | 5 · THE WHOLE HOARD | Left | 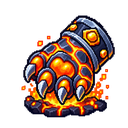 The Grand Work The Grand Work | +35% Ore Yield · +2% 5x Craft · +1% 20x Craft | 3 | 200 / 250 / 313 | 42 |
| 29 | 5 · THE WHOLE HOARD | Right | The Long Siege | +20% Gate Damage · +40 Armor Pierce · +7% Hoard Swing Speed | 3 | 200 / 250 / 313 | 42 |
| 30 | 5 · THE WHOLE HOARD | KEYSTONE | THE WHOLE HOARD | +25% Gate Damage · +40% Pet Power · +35% Hoard Damage · +25% Chest Loot · +30% Team Damage · +10% Crit Chance · +2% 20x Craft · +1% 100x Craft | 1 | 500 | 47 |
The whole tree
Everything the finished tree pays, all 7,527 points of it:
| Buff | Whole tree |
|---|---|
 100x Craft 100x Craft | +1% |
| 20x Craft | +5% |
| 5x Craft | +10% |
 Armor Pierce Armor Pierce | +360 |
 Artifact Chance Artifact Chance | +54% |
| Ball Regen | +72% |
| Cheaper Bars | +15% |
| Chest Loot | +103% |
 Chest Speed Chest Speed | +9% |
| Chest Tier-Up Chance | +9% |
| Coin Gain | +136% |
 Crit Chance Crit Chance | +33% |
 Damage per Pet Star Damage per Pet Star | +1.2% |
 Double Artifact Roll Double Artifact Roll | +18% |
| Double Craft | +20% |
| Drop Rate | +51% |
| Evolved Pet Damage | +30% |
| Free Craft | +12% |
| Gate Accuracy | +210 |
| Gate Attempt Time | +15s |
| Gate Cooldown Cut | +10% |
| Gate Damage | +205% |
| Gate Damage per Shiny in your Dex | +3% |
| Hoard Damage | +96% |
 Hoard Pet Slot Hoard Pet Slot | +4 |
 Hoard Swing Speed Hoard Swing Speed | +57% |
| Ore Yield | +166% |
 Pet Power Pet Power | +204% |
 Shards from Chests Shards from Chests | +157% |
| Skill Point Drops | +27% |
| Team Damage | +81% |
| Triple Craft | +26% |
| XP Gain | +81% |
Tips
- You only need one parent to move down a side, so you can dive one branch to a collar keystone before filling in the rest.
- The first collar keystone is the cheapest crew slot in the game after the first few shard slots.
- Deep rows are gate-locked: points saved before gate 47 still cannot buy the final row.
See also
- The Hoard — Your pets crack chests around the clock and besiege the 50 gates that unlock the rest of the game.
- Hoard Chests — The five Hoard chest tiers: open times, loot, the chest cycle, banked chests, keys and every rare drop.
- Gates — The 50-gate ladder: how attacks work, health and armor for every gate, and everything each gate unlocks.
- Artifacts — 25 one-time finds from Hoard chests. Each multiplies its own shard-shop row: ×2 Worn, ×3 Gilded, ×4 Divine.
- Achievements — 151 one-time goals in three tiers — Easy, Hard and Extreme — and the Achievement Shop their points buy.
- Bounties — Craft bars and collect ore while a bounty is live - or, rarely, win a raid or grove run - for Bounty Points, build a streak for bonus points, and spend them on upgrades that reset each prestige.
- Hoard Pets — Rampart Ram, Vault Pangolin, Warlord Hyena — three pets only Hoard chests can pay, each built for one Hoard job.
- Crafting — The CRAFTING menu turns bin ore into bars instantly. Every recipe, the CRAFT ALL button, every craft chance, and the ALLOY page.